Smartphones are by far the most common form of camera used today, and it’s easy to see why: they’re compact, most people have one with them at all times, and many can take photos that rival standalone point and shoot cameras.
To help you take the best photos with your phone, we’ve laid out ten handy tips we find ourselves using every day. With this knowledge in hand, you’ll be able to produce some awesome shots from a fairly limited though continually improving camera platform.
1.Know Your Auto Mode
Knowing how the automatic shooting mode on your smartphone camera works can greatly help you take good photos. Take the time to learn when it uses high ISOs, when it uses long shutter speeds, and adjust how you take photos accordingly. It especially helps to know when the auto mode struggles, as you can then decide to override the default settings where appropriate.
2.Override the Defaults
Smartphones are better than ever when it comes to choosing settings automatically, but they don’t always get it right. Metering in tricky conditions, particularly indoors and on overcast days, can still leave a lot to be desired, even with the best cameras on the market.
If you think the white balance or exposure is off, many smartphone cameras allow you to adjust these parameters to whatever you desire. Almost all phones include a slider in the automatic mode that can adjust exposure on the fly, so there’s no reason to capture photos that are too bright or too dark. White balance adjustments often require a switch from auto to manual mode (where supported), but many cameras now support fine adjustments to color temperature.
The best manual modes allow you to change ISO and shutter speed as well, allowing you to choose how much motion blur will be present in your images, and how much grain will be visible. Longer shutter speeds, typically less than 1/30th of a second, will require steady hands. ISOs above 800 on a smartphone tend to introduce noticeable grain, but capture significantly more light than lower ISOs. It’s worth playing around with these settings to find the best combination for the shots you want to achieve, and the great news is more high-end phones than ever include these comprehensive manual modes.
If center-weighted metering isn’t providing the right results, you might also considering switching to spot-metering, which some cameras allow you to do. Center-weighted looks at the entire image and meters according to what it sees, with a preference on the center of the frame. When shooting subjects off-center, it can be a good idea to switch to spot metering so the area around the ‘spot’ you select is exposed perfectly. Not every camera allows you to change this setting, but a handful that include detailed manual modes do come with a metering mode switch.
3.Use Good Posture
A key method for reducing blur is knowing how to hold a smartphone camera in a stable way. Holding your arms outstretched or far away from your body can make them sway more when photographing. Moving your elbows into the sides of your body can give a bit of extra stability where needed, as can physically resting the smartphone on a stable object.
Taking your smartphone photography to the next level
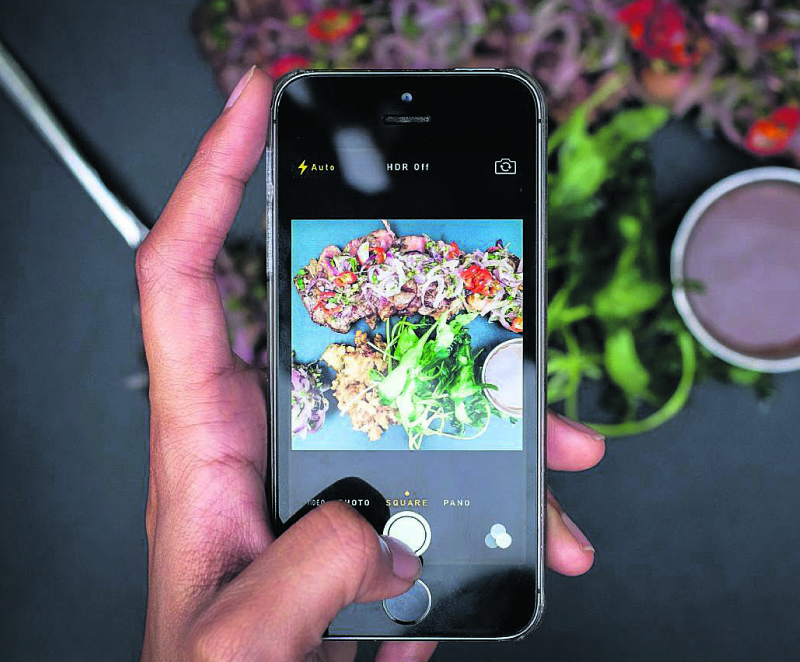
If you want perfect stability, it is possible to get a tripod attachment that you can slot your smartphone into. You’ll probably look a bit silly bringing a tripod out and about to use with your phone, but we have seen and achieved some fantastic shots with a tripod in hand. Tripods are especially useful if your smartphone camera doesn’t include blur-reducing optical image stabilization (OIS), or if there’s a manual mode that supports long-exposure photography.
4.Never Digitally Zoom
In the original version of this article, we advised users to never zoom with a smartphone camera, but these days that advise isn’t always correct. Many phones, including the iPhone X and Samsung Galaxy Note 8, include secondary cameras that provide 2x optical zoom. There’s no reason you shouldn’t use those cameras, as they provide an optical zoom without the loss of image quality.
Instead, what we advise against is digital zooming. This is what happens when you pinch or swipe to zoom on most phone cameras: the phone simply enlarges and crops the output from the sensor before the photo is captured.
Digitally zooming before capturing does not allow you to reframe the image after the fact: you're essentially losing data and reducing quality with no way backwards. Yes, the image will appear to show an image in the distance closer than it would otherwise, but you can very easily take the photo without zooming first, and then crop it afterwards. Taking the photo without zooming provides flexibility and the ability to change your mind later. It’s the best of both worlds.
If you have a phone that does include a 2x optical zoom, it’s best to stick to photos at either a 1x or 2x zoom, as this will give you the full quality of the wide-angle and zoom cameras respectively.
5.Take Multiple Shots
There is plenty of storage in your smartphone, so for every shot that you want to absolutely nail, it’s worth taking several photos in quick succession. When photographing dynamic or fast-moving objects – such as people, pets, cars, etc. – taking multiple photos will allow you to choose the best shot later, without worrying about getting that one perfect image in the first take.
Better yet, many smartphones offer neat burst photography features. Most will collect a sequence of shots into a single ‘photo’ and allow you to set whichever photo from the bunch is the best shot. Some phones will even analyse the photos for you and pick out shots it thinks are the best, often looking at whether everyone is smiling, or whether the subject is in focus.
We’ve seen phones that can even combine the best parts of every shot into a single photo, ensuring everyone is looking at the camera and smiling without actually needing everyone to do so at once. Play around with what your camera can do, you might be surprised at just how clever it can be with a burst shot sequence.
6.Edit
The final piece of the puzzle that often stops a photo captured with a smartphone from looking truly awesome is the post-processing stage. All the detail and necessary information has been captured, but it may not look as vibrant as you were after, or as sharp, or as beautiful.
It’s easy to fix this: chuck the photo in an editing program on your computer, like Lightroom, or even use an app on the device itself and begin playing around. After moving a few sliders and ticking a few boxes, the results might astound you and your friends.
7.Capture in RAW
Capturing RAW photos ties in with the previous tip on editing. For years now, DSLR users have been capturing in RAW to assist with the editing process and get the most out of their shots. Today, a small handful of smartphones support RAW capture, so if you’re serious about editing, considering switching to RAW instead of basic JPG capture.
For those wondering, RAW is an image format that captures unprocessed (raw) data from the camera. When you capture using JPG, aspects such as white balance are baked in to the final shot, and detail is lost in the compression process. The RAW format captures everything, before white balance and other parameters are set, and without lossy compression. Editing using RAW images provides the most detail, and allows you to modify things like white balance and exposure with far less quality loss relative to JPG.
While RAW is best for editing, photos captured used in this format are typically 3 to 5 times larger than their JPG counterpart. If storage space is a concern, RAW is not for you.
8.Light it Right
If you want to get serious about smartphone photography, it’s crucial that your photos are lit well. Small sensors typically found in phones are not always capable when lighting gets poor, so it’s always best to ensure your subject is well lit when taking a shot. If you can get your camera shooting at ISO 200 or lower, you’ll see less grain in the final image, and photos will look clearer and more impressive.
One way to achieve better lighting for your smartphone photos is to get strong artificial lights, but this probably isn’t practical for most people. The flash also tends not to be so great, so you can rule that out as well. This leaves natural light as the best source, and there are a few tips to getting the best shots in the lighting you have.
Like when photographing with any camera, ideally the sun should be behind the camera’s lens, shining light onto the subject without entering the lens directly. Pointing a camera towards the sun will cause shadowing and a loss of contrast, so try not to do so unless you want an artistic effect. In cloudy conditions the bright sun can be diffused throughout the sky, presenting a challenge for phone cameras with limited dynamic range, so avoid shooting up to the sky if it’s not a sunny day.
These tips hold for indoor photography as well. If you’re capturing a group photo, don’t make everyone stand in front of a window with bright sunlight streaming through. Instead, you’ll get a much better shot if you use the window as a source of light: get everyone to face the window, and take the photo with your back to the window.
As we mentioned earlier, it might also be worth exploring spot metering to get the exposure just right, especially when there’s strong backlighting. Ideally you wouldn’t be shooting when there’s strong backlighting as smartphone cameras typically have weak dynamic range, but sometimes it’s necessary. And sometimes you can experiment with reflective surfaces to get light in just the right positions: often a simple white piece of paper will suffice at directing light from the sun (or an artificial light) onto your subject.
9.Sideload the Google Camera App
This tip is exclusive to Android smartphone owners, and those who want to do a bit of tinkering. The idea here is that Google’s Pixel smartphones have very good cameras, and part of this comes down to Google’s excellent processing and HDR implementation. In other words, what makes the Pixel cameras so good is software, not hardware, and if you put the same software on other smartphones, you might see an improvement to image quality.
On some phones, users have seen image quality improvements by using the Google Camera app instead of the included camera app, particularly to dynamic range, HDR, and low light performance. The app isn’t going to magically take a poor camera and make it as good as the Pixel; not every part of the Pixel’s excellent processing is transferrable to other phones through the app. The Pixel itself will always deliver the best results using Google Camera. But in some cases, the Google Camera app is far better than the stock app on other handsets, and is worth installing for a boost to quality.
Downloading and installing Google Camera is easy. Grab the latest version that works on your handset from APKMirror, and install it on your phone. Note that the newest version may not work if you are stuck on an older version of Android. It may also be worth experimenting with the Google Camera HDR+ port, which is a tweaked version of the app designed to unlock even more processing power. As with installing any app outside the Google Play Store, you will need to allow installation of apps from unknown sources in your handset’s security settings. But don’t worry, the links we’ve provided in this article are safe, verified versions of the Google Camera app.
10.Know When to Use Portrait Mode
The final tip relates to portrait modes, which have become increasingly more common in the last year. Portrait modes attempt to simulate the increased background blur, or ‘bokeh’, available from DSLR cameras with wide-aperture lenses. In many cases this is achieved through an additional sensor that provides depth information, though phones like the Google Pixel 2 can simulate bokeh through smart edge detection and without additional hardware.
As portrait modes are a shallow depth-of-field simulation, rather than the real deal, they have problems associated with them. Edge detection isn’t always perfect, so there are times when you capture a photo and areas are blurred that shouldn’t be. At other times, the blur doesn’t look natural, or looks closer to a Gaussian blur than a realistic lens blur. The key to capturing good photos using portrait modes is knowing when the portrait mode is likely to succeed, and when it will struggle.
Throughout our experience with a wide range of phones, most portrait modes struggle in highly detailed scenes, when there is no clear distinction between the foreground subject and the background you wish to blur. In these cases, you’ll often be left with a worse photo than if you didn’t use the portrait mode. Some cameras struggle if the subject is too close, or if the lighting isn’t very good. Stick to ideal conditions for the best results.
But when everything is working well, some cameras produce fantastic simulated depth of field results that can take the shot to the next level. Don’t simply ignore the feature because it’s not 100% reliable; play around, see what works, because some results can be stunning.


